Bootstrap Checkbox Class
Overview
In some cases the simplest things may possibly get extremely vital-- especially in case you get to need them. For instance precisely how do your visitors communicate with the webpages you build stating a simple Boolean act-- simply just yes or no regarding a number of the questions you should ask, precisely how they do confirm the conditions or maybe line up a few of the attainable options they might have. We in most cases surpass this without paying a lot of an attention to the element responsible for such actions but the Bootstrap Checkbox Toggle is really a quite significant feature-- one our forms can't really perform without.
In the most recent fourth edition of the Bootstrap system we are offered with the
.form-check.form-check-label<div>.form-check.form-check-label<label><input>.form-check-inputThe ways to utilize the Bootstrap checkbox:
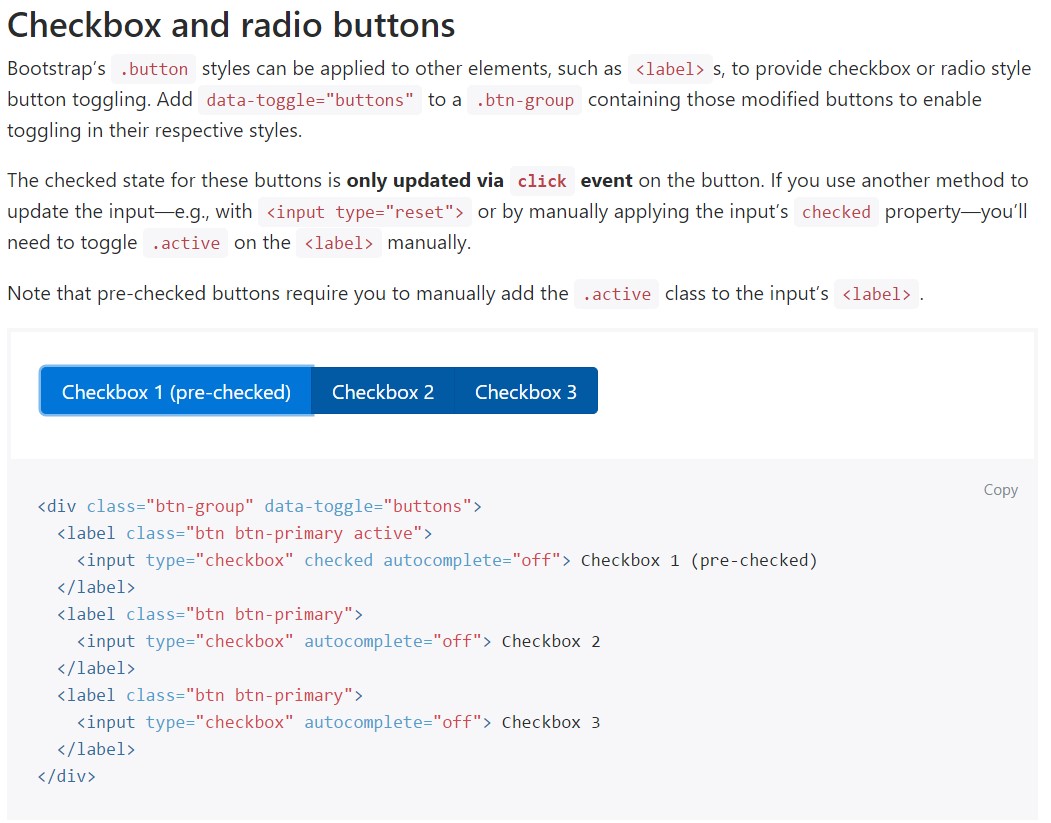
The inspected state for these kinds of buttons is only updated with click event on the button. If you use some other solution to upgrade the input-- e.g., with
<input type="reset">.active<label>
<div class="btn-group" data-toggle="buttons">
  <label class="btn btn-primary active">
    <input type="checkbox" checked autocomplete="off"> Checkbox 1 (pre-checked)
  </label>
  <label class="btn btn-primary">
    <input type="checkbox" autocomplete="off"> Checkbox 2
  </label>
  <label class="btn btn-primary">
    <input type="checkbox" autocomplete="off"> Checkbox 3
  </label>
</div>
Sometimes we really need the checkboxes to take place in our forms without the user really having the ability to bring some activity selecting them-- that is definitely where exactly the disabled option appears in.
In order to disable appropriately a checkbox in Bootstrap 4 utilizing the basic HTML attribute
disabledOn the occasion that you like the tip and indeed would like to work on this you should appoint the
.disabled.form-checkOne more scenario
Any time you are applying checkboxes, wrap them in a
<label>.custom-control.custom-checkboxWork with
.custom-control-input<input>Additionally use two
<span>.custom-control-indicator.custom-control-description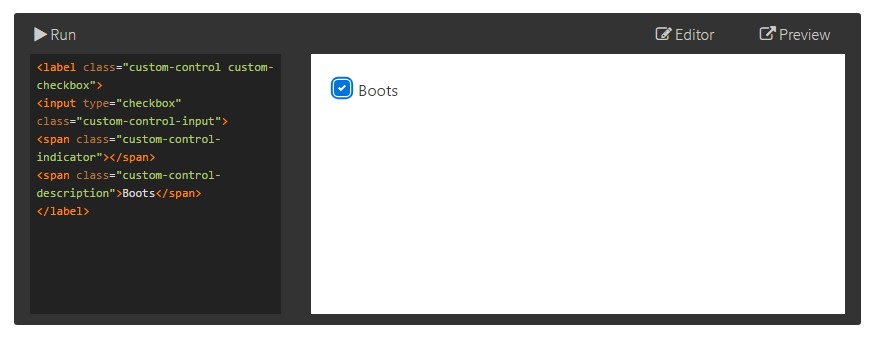
<label class="custom-control custom-checkbox">
<input type="checkbox" class="custom-control-input">
<span class="custom-control-indicator"></span>
<span class="custom-control-description">Boots</span>
</label>
Bootstrap Checkbox Label forms
Default checkboxes and radios are raised upon with the help of
.form-checkDisabled checkboxes and radios are assisted, but to deliver a
not-allowed<label>.disabled.form-checkA brand-new element for the Bootstrap version 4 framework is the introduction of the so called custom form elements. These are the similar features we are knowing in capability though designated much more beautiful and in the Bootstrap way. Having them you may bring in some taste as well as individuality to your web content by simply just specifying a number of extra classes to the controls you include in your forms.
In order to utilize customized checkboxes wrap them in a
<label>.custom-control.custom-checkbox<input>.custom-control-input<span>.custom-control-indicator.custom-control-descriptionConclusions
That's essentially all you require to handle in order to include a checkbox element for your Bootstrap 4 powered site and bring in certain custom made flavor to it putting in it a stylish looks. Right now all you need to do is repeat the exercise unless you've examined all of the checkboxes needed are currently on the webpage.
Check several online video guide about Bootstrap checkbox
Related topics:
Bootstrap checkbox authoritative information
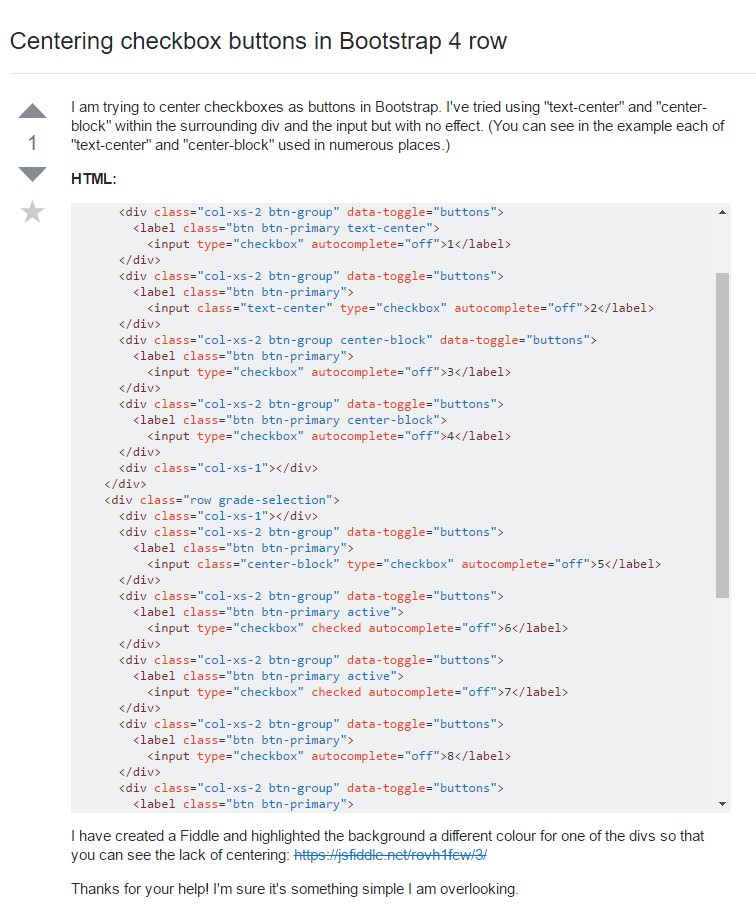
Centering checkbox buttons in Bootstrap 4 row
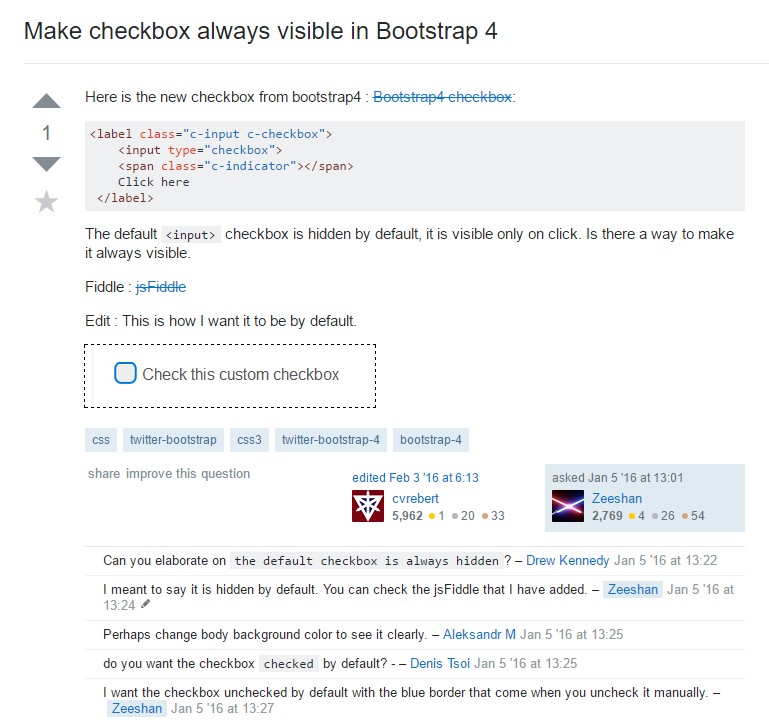
Make checkbox always visible in Bootstrap 4